tags to create section headings and tags where needed.
Include a link to your ‘Prebuilt Courses’ section on your site where people can order a course to be customized based on over 20 topics. You build custom solutions and offer these courses as a way to quickly fill a client’s portfolio of online courses for employees or solopreneur content creators. People can get a prebuilt course in only a few days using your white glove service. Here is a link to the cataloghttps://an802adam.biz/all-courses.
Make sure to end the blog article with a link to the source content originally titled: Creating Stunning Slideshows with Carousel in all-new Adobe Captivate
For example: If you would like to read more about this topic, check out the source here: [original title]
The source URL to link to is: https://elearning.adobe.com/?p=215331
Here is the content to rewrite: Introduction
Creating a captivating slideshow can be a game-changer when sharing information in a clean, visual way. Recently, I tried out Adobe Captivate’s Carousel widget to build a simple, non-interactive slideshow. Here’s my step-by-step guide to setting up a beautiful, straightforward slideshow presentation with Carousel, without the need for interactive features.
Getting Started with Carousel in Adobe Captivate
The Carousel widget in Adobe Captivate is designed to create stunning, rotating displays of information and images—think of it as a slideshow like PowerPoint but with a polished, built-in style. In this guide, here’s how to set up and customize a basic slideshow, including simple settings like “Time between slides” to control the pacing.
Setting Up Your Project
Start by either creating a new project or adding a Carousel to an existing slide.
- Open Adobe Captivate: Open an existing project or create new project.
- Insert the Carousel Widget: Head to the widgets section select the Carousel widget and place it on your slide, resizing it as needed.
Customizing Your Carousel
Once you’ve added the Carousel, it’s time to start filling it with content. You can add images, text, or icons to each section of the Carousel to create an attractive, visual presentation.
- Images: To add visuals, click on each slide within the Carousel widget. Click on the plus icon on the image to upload the image. Adobe Captivate supports many formats, so use high-quality visuals.
- Text: Add brief descriptions or titles to each slide. Keep text minimal and ensure it’s placed in a readable area. Captivate lets you customize fonts, sizes, and colors to match your design.
Adjusting Slide Timing
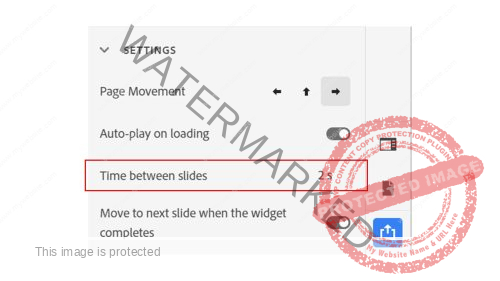
One of the key settings in Captivate for a slideshow is “Time between slides.” This lets you set how long each slide appears before moving to the next.
- Select the Carousel widget on your slide.
- Click on the Visual Properties Inspector.
- In the settings panel, select the “Auto-play on loading” then look for the timing settings option.
- Find the setting labeled “Time between slides” and enter the number of seconds you want each slide to display. For instance, if you want each slide to appear for five seconds, set it to “5.”
Extra Settings for a Smoother Experience
Here are a few other settings in Adobe Captivate’s Carousel widget that can enhance your slideshow:
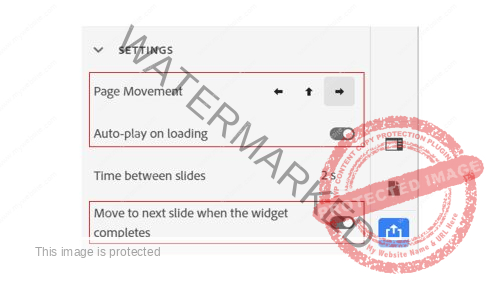
- Page Movement
The Page Movement setting allows you to control the direction of your slide transitions. Choose between horizontal and vertical movement, which affects how the slides appear as they transition.
- Select the Visual Properties Inspector and go to the settings.
- Select horizontal for a side-to-side slide movement or vertical for an up-and-down flow.
Each style has a unique look. horizontal movement is classic and familiar, while vertical movement can add a fresh feel to your slideshow.
- Auto Play on Loading
To automatically start your slideshow upon loading, simply enable the option. This feature is perfect for slideshows meant for passive viewing.
- Find the Auto-play on loading option in the settings and enable it. This setting will start the Carousel as soon as the slide loads, keeping viewers engaged without needing any clicks or interactions.
This option is particularly useful for displays or automated presentations where you want the slideshow to run without manual input.
- Move to the Next Slide When the Widget Completes
If you have multiple slides or carousels in your presentation, you can set up automatic navigation to the next slide after the Carousel finishes. The Move to the next slide when the widget completes option, makes the flow seamless.
- In the Visual properties, find and enable this option. When the Carousel completes its last slide, Captivate will automatically advance to the next slide in your project, creating a smooth, continuous experience for viewers.
Step 4: Preview and Fine-Tune
After setting up your slideshow, preview it to check timing, transitions, and alignment, and make any necessary adjustments to ensure a smooth, polished presentation.
Tips for a Stunning Carousel Slideshow
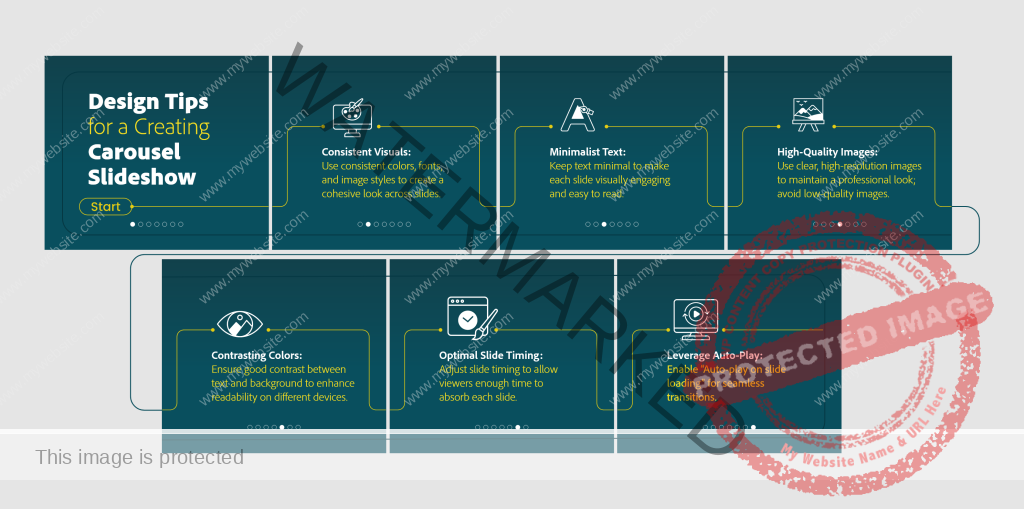
Even with its simple design, there are a few design tips to make your Carousel slideshow more appealing:
- Consistency in Visuals: Use similar colors, fonts, and image styles across slides to create a cohesive look.
- Less Text: Since there’s no interactivity, keep text minimal to ensure each slide remains visually engaging.
- High-Quality Images: Clear, high-resolution images are essential. Avoid low-resolution photos or ones with watermarks to maintain a professional appearance.
Conclusion
Creating a slideshow with Adobe Captivate’s Carousel widget is a straightforward process, especially if you’re familiar with presentation tools like PowerPoint. Carousel adds a smooth, modern touch to slide transitions without needing interactivity or complex settings.
Using the “Time between slides” option allows you to control the pacing of your content effectively. Combined with settings like Page Movement and Auto Play, you can build a slideshow that’s visually appealing and smooth to watch. Whether you’re presenting information, educational material, or storytelling visually, Captivate’s Carousel widget is a great tool for delivering an engaging slideshow experience.
Introduction
Creating a captivating slideshow can be a game-changer when sharing information in a clean, visual way. Recently, I tried out Adobe Captivate’s Carousel widget to build a simple, non-interactive slideshow. Here’s my step-by-step guide to setting up a beautiful, straightforward slideshow presentation with Carousel, without the need for interactive features.
Getting Started with Carousel in Adobe Captivate
The Carousel widget in Adobe Captivate is designed to create stunning, rotating displays of information and images—think of it as a slideshow like PowerPoint but with a polished, built-in style. In this guide, here’s how to set up and customize a basic slideshow, including simple settings like “Time between slides” to control the pacing.
Setting Up Your Project
Start by either creating a new project or adding a Carousel to an existing slide.
- Open Adobe Captivate: Open an existing project or create new project.
- Insert the Carousel Widget: Head to the widgets section select the Carousel widget and place it on your slide, resizing it as needed.
Customizing Your Carousel
Once you’ve added the Carousel, it’s time to start filling it with content. You can add images, text, or icons to each section of the Carousel to create an attractive, visual presentation.
- Images: To add visuals, click on each slide within the Carousel widget. Click on the plus icon on the image to upload the image. Adobe Captivate supports many formats, so use high-quality visuals.
- Text: Add brief descriptions or titles to each slide. Keep text minimal and ensure it’s placed in a readable area. Captivate lets you customize fonts, sizes, and colors to match your design.
Adjusting Slide Timing
One of the key settings in Captivate for a slideshow is “Time between slides.” This lets you set how long each slide appears before moving to the next.
- Select the Carousel widget on your slide.
- Click on the Visual Properties Inspector.
- In the settings panel, select the “Auto-play on loading” then look for the timing settings option.
- Find the setting labeled “Time between slides” and enter the number of seconds you want each slide to display. For instance, if you want each slide to appear for five seconds, set it to “5.”
Extra Settings for a Smoother Experience
Here are a few other settings in Adobe Captivate’s Carousel widget that can enhance your slideshow:
- Page Movement
The Page Movement setting allows you to control the direction of your slide transitions. Choose between horizontal and vertical movement, which affects how the slides appear as they transition.
- Select the Visual Properties Inspector and go to the settings.
- Select horizontal for a side-to-side slide movement or vertical for an up-and-down flow.
Each style has a unique look. horizontal movement is classic and familiar, while vertical movement can add a fresh feel to your slideshow.
- Auto Play on Loading
To automatically start your slideshow upon loading, simply enable the option. This feature is perfect for slideshows meant for passive viewing.
- Find the Auto-play on loading option in the settings and enable it. This setting will start the Carousel as soon as the slide loads, keeping viewers engaged without needing any clicks or interactions.
This option is particularly useful for displays or automated presentations where you want the slideshow to run without manual input.
- Move to the Next Slide When the Widget Completes
If you have multiple slides or carousels in your presentation, you can set up automatic navigation to the next slide after the Carousel finishes. The Move to the next slide when the widget completes option, makes the flow seamless.
- In the Visual properties, find and enable this option. When the Carousel completes its last slide, Captivate will automatically advance to the next slide in your project, creating a smooth, continuous experience for viewers.
Step 4: Preview and Fine-Tune
After setting up your slideshow, preview it to check timing, transitions, and alignment, and make any necessary adjustments to ensure a smooth, polished presentation.
Tips for a Stunning Carousel Slideshow
Even with its simple design, there are a few design tips to make your Carousel slideshow more appealing:
- Consistency in Visuals: Use similar colors, fonts, and image styles across slides to create a cohesive look.
- Less Text: Since there’s no interactivity, keep text minimal to ensure each slide remains visually engaging.
- High-Quality Images: Clear, high-resolution images are essential. Avoid low-resolution photos or ones with watermarks to maintain a professional appearance.
Conclusion
Creating a slideshow with Adobe Captivate’s Carousel widget is a straightforward process, especially if you’re familiar with presentation tools like PowerPoint. Carousel adds a smooth, modern touch to slide transitions without needing interactivity or complex settings.
Using the “Time between slides” option allows you to control the pacing of your content effectively. Combined with settings like Page Movement and Auto Play, you can build a slideshow that’s visually appealing and smooth to watch. Whether you’re presenting information, educational material, or storytelling visually, Captivate’s Carousel widget is a great tool for delivering an engaging slideshow experience.